5 Easy Tips to Transform Your Messy Refrigerator

Let me show you how I worked on a refrigerator transformation for a family of five.
I will show you how to transform any refrigerator so it is not only cleaner but more organized and easy to use. Breaking the cleaning and organizing process down into steps will help you work more efficiently.
The refrigerator I organized has a fridge on top and two sections on the bottom that can either be used as a refrigerator or freezer. These clients have a freezer in the garage, so they wanted just one side of the bottom to be used as a freezer.

1. Clear everything out
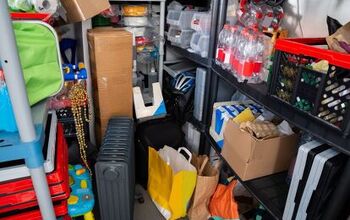
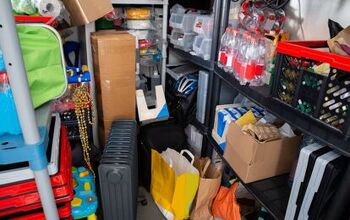
The first thing I did was clear off the dining room table. I needed a surface to clear out all the items from the refrigerator.
I pulled everything out of the refrigerator and placed it on the table. This first step is important to help you take stock and sort through what you have.

2. Clean the inside
Once everything was emptied out of the refrigerator I was able to give the inside of the refrigerator a good cleaning. You can unplug the refrigerator while cleaning to save some energy and make it more comfortable to work.
Pull out every removable shelf and drawer to wash them. Be sure to use cold or room temperature water, as hot water is incompatible with the tempered materials they are made from.
Let them sit at room temperature for a bit before washing as these materials retain the cold temperature for long periods.
When done, be sure to dry them off well so you don’t bring humidity into the refrigerator. Spray and wipe everything down on the inside of the refrigerator until you’re satisfied with the end result.

3. Storing raw meats
I stored all the raw meat in the drawer of the freezer. When organizing your refrigerator and freezer, consider the possibility of power outages.
In the case of a power outage, you want to make sure raw meats are placed in a way that will prevent them from dripping onto the rest of the items. Place meat as close to the bottom of the freezer as possible, or in a tray.

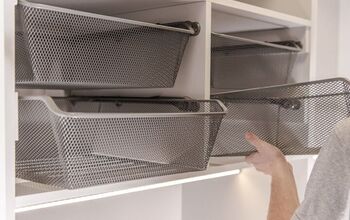
4. Sort and store
Now that you’ve put in the meat, sort the items into categories before putting them back in the refrigerator. Start by discarding the expired items. Then sort items by produce, dairy, meat, leftovers and condiments.

Refrigerator door shelves are perfect for condiments. I put the dairy items, such as yogurts, butter, eggs, and milk, on the top shelves. The shelf below that is where I put leftovers and open products that need to be used up. Then I put the fruit in one drawer and the vegetables in another.
I designated the top shelf of the bottom refrigerator section for grain products like bread and tortillas. Then I put cooked meats and ready-made packaged foods in the drawer.
5. Labels
Another helpful tip for organizing your refrigerator is to label the shelves and drawers. This will help remind people where things go. It will prevent everyone from haphazardly tossing things back into the refrigerator without paying attention to where things belong.


Refrigerator transformation
I hope you find these 5 steps to be useful in your refrigerator organization. Breaking the process down into steps helps to make sure you don’t get overwhelmed. It also provides the maximum amount of ease to restock, organize, and stay organized.
Leave me a comment and let me know if this tutorial helped you get your refrigerator cleaned and organized.
Next, here's How to Organize a Skinny Freezer to Maximize Space.


Comments
Join the conversation