Extreme Garage Makeover: Transforming Chaos Into Order

I really don't want to show you my garage because it is an absolute disaster, but here goes. This out-of-control mess has been driving my husband crazy, and honestly, it's a huge embarrassment.
Living with a dirty and cluttered garage can push even the most patient spouse to the edge. I'm determined to get this under control and surprise my husband with an extreme garage makeover.
Even if you don't have a garage, I'll be sharing lots of organizational tips and creative storage solutions you can use in any space.
So, if you're ready to witness a transformation of epic proportions, let's get started.
Simplify Recommends!
Table of contents
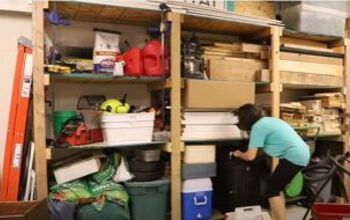
Garage Before


1. Cleaning
First on the list was a good cleaning. In the past, I've always completely emptied out the garage, moving everything to the driveway and then hosing it down.
But this time, the weather was rainy and windy, and honestly, the thought of moving everything out was overwhelming. So, I decided to tackle one area at a time.
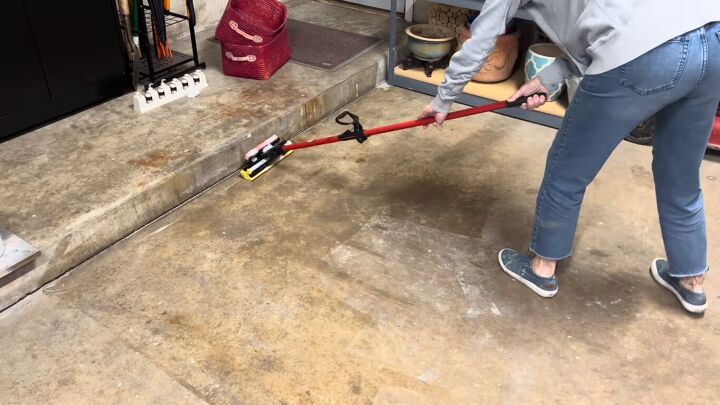
I started with the side of the garage where I often use my tools and spray paint in my little tent. Not surprisingly, this was the dirtiest area of the garage.

First, I swept with a broom and then with an old vacuum. Then, I filled a bucket with soapy water and wiped everything down.

I used a mop to wash down the walls, ceiling, and floor. No doubt, I'll need a new mop head by the time I'm done.
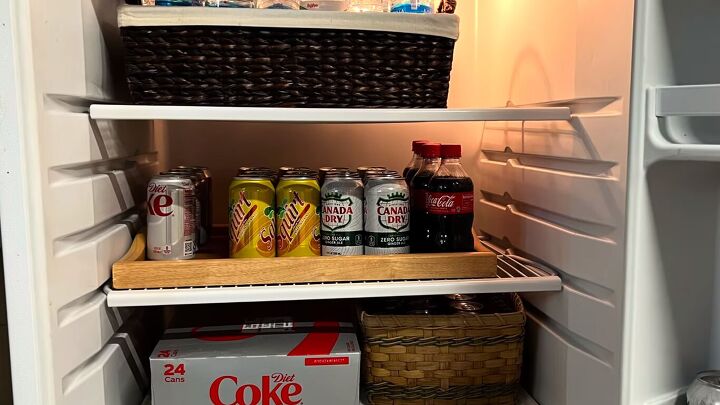
We have a 20-year-old refrigerator where we store extra beverages, and it also needed a good cleaning. I figured while I was cleaning the outside, I might as well clean the inside too.
Honestly, I didn't really think the inside was very dirty until I removed the lower shelf. Yuck! A soda must have exploded over the winter and dried to the bottom.

Because the upper shelves are wire, bottles and cans often fall over. So, I looked through my base storage room and found a large wicker basket and a wood tray that would help to keep everything organized.
2. Create Zones
Creating zones in a garage is an organizational game-changer. I don't know why I hadn't done this before. When you establish designated areas for similar items, everything is easier to find and you streamline your workflow.
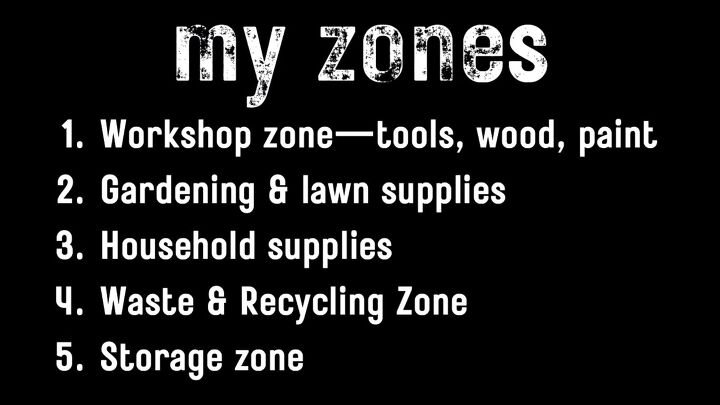
My main concern was creating space in one area for all my tools and DIY supplies.

I threw out a bunch of small wood scraps and reorganized the ones I kept so that I could use the wood cabinet with cubbies to store my tools, which had been on shelves on the opposite side of the garage.

Then, I moved all the pots and gardening supplies to the shelves instead. This would now become my new lawn and gardening zone.

3. Organizing
Once you create zones, organizing becomes so much easier. Now you just need to find ways to categorize and store the supplies in each zone.

To create extra space along the back wall, I bought a tool organizer from Amazon and got rid of the red garbage can. Not only does it take up much less space, but it's easier to see and grab the tools I need.

I needed to create storage for household items near the back door.

The white cabinet was full of spray paint, and the shelves weren't adjustable or deep enough for large items anyway, so I moved it to a sidewall.


I tried moving the old microwave cart to the door, but as you can clearly see, that didn't work out so well.

So, I decided it was time to invest in a new cabinet. I found a good deal on this black one from Amazon, so I splurged and bought two.

Having the white cabinet along the side wall wasn't a good idea. Our garage is quite narrow, and when both of our cars are pulled in, I couldn't access the cabinet.

So, I put it on the curb, which seemed very apropos because I had picked it up off the curb myself five or six years ago. I also put the microwave cart on the curb, and both items were picked up by people in no time at all.

The new cabinets were super easy to assemble and seemed to be really sturdy. I was especially glad that the feet were adjustable because my garage floor is slightly angled and I usually have to place shims under everything.

Unlike the old white cabinet, the shelves are adjustable, so I could make room for paper towels and my husband's doomsday supply of water bottles. I moved the spray paint to the second cabinet. This will now be the painting zone. In the winter, I can set up my tent in the open space next to the side door.

4. Declutter as You Go Along
Most organizational experts recommend decluttering first, but I decluttered as I went along. For example, when I was rearranging the wood, I threw out pieces that I'll likely never use.
And when I was moving the tools, I threw away about 30 half-used sanding discs and all of the original cardboard boxes the tools came in. Instead, I put all the owner's manuals in a single Ziploc bag.

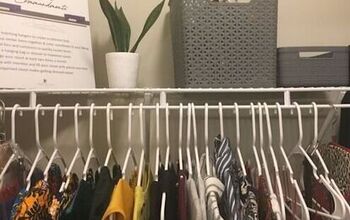
Even though I threw away and donated a lot of stuff, I still needed to maximize the space to make room for all the stuff I kept. That included making use of the corners. This tall laundry basket fit perfectly in the corner to hold tall spindles and wood trim pieces.

5. Make Use of Vertical Space
Even more important than making use of the corners is making use of vertical space. To help organize my wood stash, I ordered these storage racks from Amazon.

Since I primarily have cement block walls, I used an inexpensive hammer drill and a carbide drill bit to drill the holes. I normally use concrete screw anchors, but this time I used wedge anchors, which can hold more weight.

You just insert the anchor into the hole, add the washer, and then just barely screw on the nut. Hit the nut a couple of times with a hammer, which will cause the anchor to expand inside the hole. Remove the nut, attach your item, and then put the nut back on and tighten it.
Once I had the two braces attached to the wall, the arms easily attached with a machine screw and a lock nut. This only took me about 30 minutes. Holy cow! I should have done this a long time ago.

Vertical space doesn't have to be on a wall; it could be on the ceiling, a door, or on the side of a piece of furniture. I decided to hang my level, yardstick, and T-square on the side of the cabinet. Storing all of my tools just required a couple of long wood screws.

To organize my extension cords, I attached an old hat rack on the wall next to the cabinet. Then, I wrapped each cord with a Velcro strap and hung them on the hooks.

My cords have been a wadded-up mess for so long I couldn't shape them into neat loops, but it still looks a hundred times better.

You can even create storage along the edge of a shelf by attaching a magnetic strip. They're very inexpensive and available with heavy-duty pull force to hold even larger tools.

I also wanted to get the ladder up off the floor because sometimes when I'm moving things around, it falls over. This little ladder mount was easy to install with just a couple of concrete screws.

I made use of what otherwise would have been wasted space by hanging it between the refrigerator and a built-in closet.

I can't tell you how many times I've hunted around the garage looking for a dustpan because they had no designated spot. The most logical place for them was next to the door, so I attached two hooks to the wall, one for the dustpans and one for a small brush. This little addition is going to save me so much time.

6. Refresh With Paint
My garage walls desperately need some fresh paint, but the weather just wasn't cooperating. I think I'll wait until my husband can help me move the really heavy things like the refrigerator. So, I had to settle for painting the trim around the doors and window.

I wanted to paint the side door black to match the house door, but it didn't get done because the weather dropped below 60° in the garage for three days in a row.
The refrigerator also needed a refresh. Since it's lived its entire life in the garage, it has gotten rusty.

With the low temperatures, spray painting was out of the question, so I decided to cover the front with peel-and-stick wallpaper.
I removed the handles, then measured and cut out the pieces to be just a bit larger than the area to be covered.
After adhering it along the top, I peeled off the backing a little bit at a time, smoothing it out with a plastic wallpaper scraper to remove any air bubbles.

I used a utility knife to cut off any extra paper along the edges. I was afraid if I folded it over that the edge pieces might come loose over time. When applying the second piece, I tried to line up the pattern, but with this cross-hatch design, I'm not sure if they match or not.

While I had the fridge pulled out, I vacuumed and dusted the coils on the back. You really should do this a couple of times a year.
7. Update the Lighting
If you live in an older home, you might still have fluorescent tube lighting in your garage.

It was beyond time to switch them to LEDs. LED lights use 80% less energy to produce the same amount of light as fluorescent.
These inexpensive LED strip lights that I purchased last up to 75,000 hours, which is more than twice as long as fluorescent tubes that last about 30,000 hours. And the less I have to stand on a ladder to change out lights, the better.

The cost of LEDs has really come down too. These lights cost less than $30 each.
8. Update the Electrical Outlets
Remarkably, our garage only has three electrical outlets, and two of them are on the ceiling for the garage door opener and lights.

The other outlet only has two ports, and the refrigerator is plugged into one of those ports, so I only have one port available for tools.

So, I decided to install a power strip on the edge of the shelf next to the outlet. I forgot to mention that my one outlet is a 1960s two-prong outlet, so I've been using a converter that I'm sure is not very safe.

It was way past time to hire an electrician to convert it to three prongs.

9. Add Personal Touches
I want to feel happy when I'm working in the garage or just pulling in my car, so I needed to add some personal touches like a new rug.

I was going to hang a wreath on the back door, but then I knew my husband wouldn't really like it because we go in and out this door so often. So instead, I applied a rub-on transfer for a little interest. I can always sand and paint over it in the future if I get tired of it.

Since I had pulled out the transfers, I went ahead and added a few in other spots like on the refrigerator. I also cleaned up the wood area surrounding the garage door opener and added a bird transfer just above it, which conveniently hid a stain on the wall.

I still had the sign from my first retail booth sitting in my basement. The paper's a little wrinkly behind the plexiglass, but I think it's a fun surprise above the cabinets.

I wanted to hang some curtains on the window, so I spray-painted some old brackets white to match an old curtain rod. The rod was just barely long enough, so I duct-taped the two pieces together to make sure they didn't pull apart.
I had thrifted this faux Roman blind a few years ago, and it was the perfect size for the window. I'm sure it will get super dirty, but I can always throw it in the washing machine.
I brought the fern in from the patio because it might drop below freezing tonight, but it looks so nice there that I might just leave it.

Garage After
Okay, so before I open the garage door, tell me what do you remember about the way the garage used to look? Let's see it in three, two, one…


Wow, there's so much more space in here. I can't believe it. Where did all that stuff go? It looks better, a lot better.
I hope you were inspired to tackle that disaster zone in your home and turn it into a happy place. Let me know what you think of these organizational tips in the comments below!
For details of the products mentioned in this post, check out the video description box here.


Comments
Join the conversation