Upcycle Ideas From 7 Thrift Haul Items

I’ll take you through the transformation/upcycling process I went through with a haul of thrifted home decor items. I love creating home decor on a budget and you will be amazed at these before and after projects.
Some of these items are staying in my home and others are sold in my retail booth. A couple of items are from a previous Goodwill haul.
Let me show you what I did.

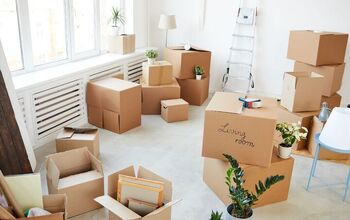
1. Thrift haul
Here’s my latest haul from Goodwill. Here’s what’s in this haul:
- A journal with a suede cover that I got for $1.99
- A tarnished gravy boat with a wooden handle for $1.99
- Votive candle holders with fork and spoon handles for $1.99 each
- Cream and sugar set that can sell for nearly $50 based on research I did online but there is a chip in the creamer
- Enamel colander for $1.00 that I can paint
- Wood wagon for $2.99 that I can maybe turn into a tray
- A metal votive candle holder For $1.99 that I can paint and turn into a planter
- A wooden paper towel holder and spice rack for $2.99 each that I’ll paint and distress as a set
- A wooden shelf with a heart that I will reconstruct because the bottom drawer is really cute.
- Glass jar for .99 cents
Wood items are your best deal at thrift stores. You have to look past the 1990s brown stain for the possibilities.

2. Wood paper towel holder and spice rack upcycle
Before painting or doing any upcycling, I like to clean the items with La’s Totally Awesome Cleaner Spray from Dollar Tree. It works well but any general cleaner will work. Get the dust off so you don’t paint over it.


A great tip to get a smooth finish when using chalk paint is to use an artist’s brush for better control. Also, mist your paintbrush every so often to keep it slightly damp. It helps the paint to go on smoothly.
Here I’m using Dixie Belle paint in Kudzu Green. I usually use Waverly or Rust-Oleum paint from Walmart but I wanted to use this color. Dixie Belle paint is expensive but it may be worth it for some projects.


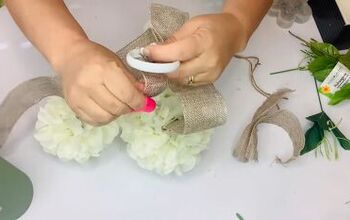
3. Metal candle stand upcycle
I’m using Rust-Oleum chalk paint in Linen White. I’m also using a thicker brush. I’m not misting the brush because I want the paint to go on thickly to fully cover the black metal.


Distressing metal is like distressing wood. I use a coarse 80-grit sandpaper to create a “chippy” look. After distressing your piece, apply wax to protect the finish.
I use Minwax Paste Finishing Wax in Natural. Apply the paste with a soft cloth putting a thin, even coat over the entire piece.

I added small terra-cotta pots from Dollar Tree. I got three for $1. I aged them with some Waverly white wax.
I accidentally got some dust from sanding on the pots as I waxed but decided I liked the way it looked so I intentionally rolled the pots around in the dust while the wax was still wet. It gave it an even more rustic look.


4. Wood cabinet upcycle
I paid $4.99 for this wood shelf from a previous Goodwill haul. I’m going to remove the glass door before painting.


5. Colander upcycle
I removed the screws that held in the handles and used a little Goo Gone to get the sticker residue off before spray painting.
I also like to use Goof Off before spray painting anything to remove grease. I used Rust-Oleum spray paint in Leafy Green.

During the winter, I spray paint items in the garage in a small tent and bring items inside to dry.


When I spray paint, I use this Rust-Oleum semi-gloss clear coat to protect the paint to make items food-safe.
6. Finished projects
Here’s a look at most of the finished projects that I upcycled. I didn’t get around to finishing everything, but these turned out great.


Upcycle project ideas
I hope you were able to learn a few new things about how to upcycle thrifted goods to give them a second life. I love doing this. Let me know what you think in the comments.
Next, take a look at these 8 Easy Thrift Flip Ideas.


Comments
Join the conversation